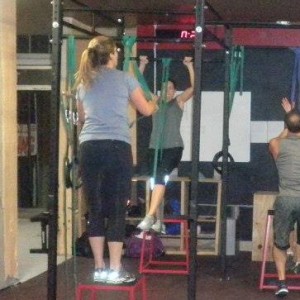
Me using bands.
I always avoided the pull-up machine at the gym, mostly for fear of looking stupid. I knew I wasn’t strong enough to do an actual pull-up, and I didn’t want to fail or make a fool of myself trying while going into a spastic, body contorting effort, to get my chin to the bar. So I never even tried. I was awe inspired by ladies who could jump up and effortlessly get their chin over the bar. It looked totally bad-ass, and I wanted nothing more than to be able to do it. But I didn’t know where to start, and I thought only really, really, really fit girls could do that. So I lacked the confidence to even try. Enter CrossFit. Wait, in CrossFit you have to do pull-ups?! But “I can’t” is usually the knee-jerk response for most people, myself included. Then something changed. I decided that I could do it. It would just require a lot of work and a lot of “looking stupid.” Thankfully the CrossFit community is encouraging and non-judgmental, so CrossFit made my looking stupid much easier to swallow. I started by using banded assisted pull-ups, that was a mistake. While there is much debate over the use of bands while doing pull-ups, I fundamentally disagree with it. Why? Because I tried it and it didn’t work.
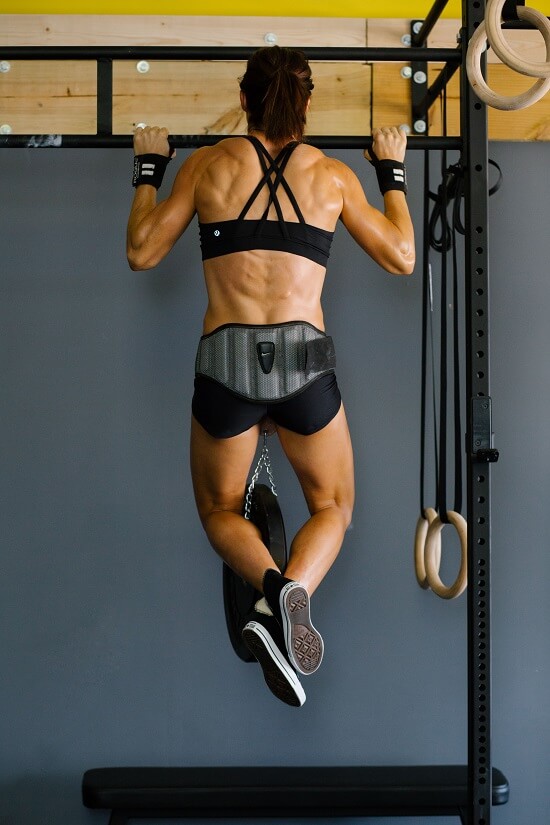
It took a lot of hard work, but here I am doing 45 lb weighted pull ups for 8 reps.
The goal is to build the requisite strength to move your body in space first. Bands provide the greatest assistance when fully stretched, in other words, in the hang position of a pull up. This is the hardest part for many people, and the bands do all the work by catapulting you upward. This results in your inability to develop the requisite strength to initiate the pull from a dead hang.
While bands are great for cycling through metabolic conditioning workouts, and giving you the feeling that you have accomplished something during the workout, they are not ideal for developing the musculature required to do an unassisted pull-up.
I have witnessed countless CrossFitter’s stuck on the bands for years. Get off the bands, people, and start working the bar hangs and negatives! Trust me, it will pay off in the long run. Below is the progression I followed to get to the point where I am now able to do weighted strict pull ups and muscle-ups. I say this because I was once not able to do a single pull-up. If I can do it, so can you. Please stop saying “I can’t” and just start laying the foundation to get your chin over that bar.
Pull Up Progression
Negative Pull Up: The number of repetitions performed are for negative pull ups. You are not performing jumping pull ups or attempting to kip. There is a short video on the negative pull up below.
- You begin the negative rep by first performing a flexed arm hang to begin the exercise.
- Perform the flexed arm hang for 5-10 seconds, followed by lowering yourself down as slowly as possible, but no faster than 3-5 seconds (the longer you can hold the negative portion, the stronger your lats will become).
- This is one repetition. Repeat for the required number of repetitions.
- Keep your butt and your abs tight during each rep, and don’t forget to breath.
- Rest at least 120 seconds between sets.
- Perform the program for 8 weeks, with one week off after your 8th week before beginning again. Test your pull up strength at the end of each 4th week.
If you have any questions about the program, feel free to contact me. I will be more than welcome to help you out.
Tips:
- Grip the bar with your palms facing away from you when performing the pull ups. If you reach failure while performing the reps without completing the set, switch to an underhand grip (palms facing you) for the remaining sets.
- Ensure you rest at the very least the minimum number of days between each progression. A “day’ is the day you are on the program, and not necessarily the day of the month, week etc. Follow each day in numerical order. If you miss a day after your rest day, begin with the next day, don’t jump around.
- If you want to perform the exercises at home, you can buy one of the door mounted pull up bars from Walmart or Dicks. But remember, more is not better, and to follow the required rest days.
- Consistency is the key. It should only take you about 15 minutes max to perform this after or before class, or at home, but it will pay off on the long run and push you closer to your goal. Also, remember to grab your buddy who has the same goal by the arm and get them on the pull up bar with you!
Negative Pull Ups:
Flexed Arm Hang:
http://www.youtube.com/watch?v=yE0ajujbhuY
Day 1Set 1: 2 reps Set 2: 7 reps Set 3: 5 reps Set 4: 5 reps Set 5: 7 reps (1 day rest) |
Day 2Set 1: 3 reps Set 2: 8 reps Set 3: 6 reps Set 4: 6 reps Set 5: 8 reps (1 day rest) |
Day 3Set 1: 4 reps Set 2: 9 reps Set 3: 6 reps Set 4: 6 reps Set 5: 8 reps (2 days rest) |
Day 4Set 1: 5 reps Set 2: 9 reps Set 3: 7 reps Set 4: 7 reps Set 5: 9 reps (1 day rest) |
Day 5Set 1: 5 reps Set 2: 10 reps Set 3: 8 reps Set 4: 8 reps Set 5: 10 reps (1 day rest) |
Day 6Set 1: 6 reps Set 2: 10 reps Set 3: 8 reps Set 4: 8 reps Set 5: 12 reps (2 days rest) |
CrossFit Prelude. “The Beginning of Something Better.” What is Your Something?